Customization Guide – Uploading Your Landing Page Header Background
Guide to changing the Landing Page Header background image in your DivTag Templates
Step1: Open Code Editor
Click here to log into your Weebly account and to open up the W Theme Editor.
Click to enlarge image for more detail
Step2: Edit Your background Image File
Here we will edit your custom landing page header background image to ensure that it fits into the DivTag template. We will first re-size it to the right size, and save it in the correct image format and name.
Header Background Image Size
The Landing Page Header will re-size to the content you insert in the landing page header area. The minimum size of the landing page header background image 1280px by 600px. It is advisable to have an image with height higher than 600px. If the background image is long enough, you see a blank between the header area and the navigation bar.
The default landing page header is 1280px by 850px. Depending on your preference, you may need to re-size your background image using image editors such as Photoshop, Microsoft Paint or other free Image Editing Tools. You can check the size of your image file by looking at the “Properties“** of your image file (right click on the image file, select “Properties“, then click the “Details” tab)
Header Background Format
Your background must be in the JPEG image format. You can tell which format your image file is in by looking at your image file’s file extension (for example, .png or .jpg). If your image file is not in the JPEG format (.jpg), you can simply re-save the file as a JPEG format by using image editors such as Photoshop or Aviary.
Header Background Name
Rename your background image file so it is exactly “landingbg”. This is important to have your background image file named this way otherwise it will not show up in the template. When you are in your image editor (such as Microsoft Paint), type in “landingbg” in the File Name box, and select “JPEG” in the “save as type” box. So the file name will be “landingbg” and the file type should be JPEG.
Step3: Upload Your background Image File
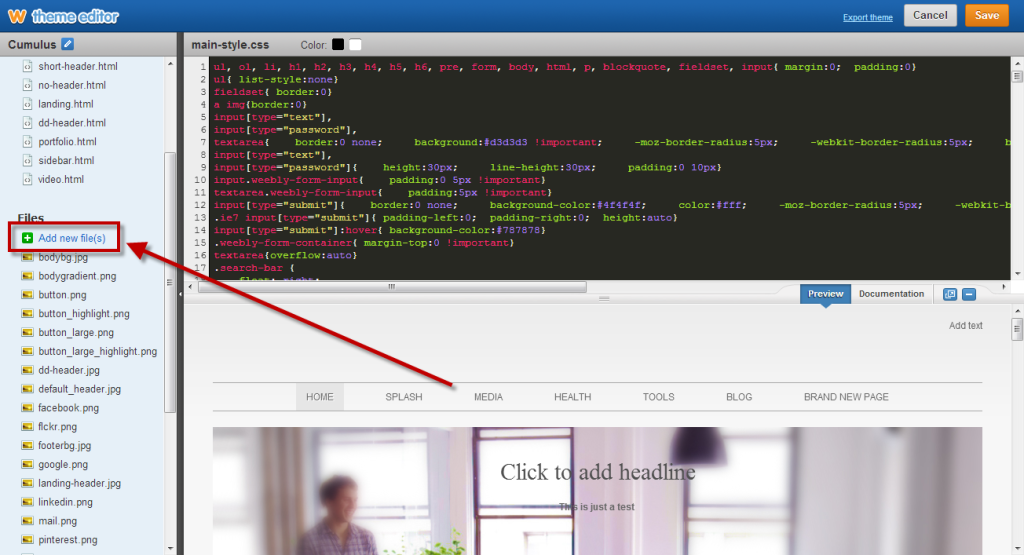
In the Files section of Weebly Editor, upload your background image file created in Step 1 above by clicking on “Add new file(s)”.
Since you have renamed it to exactly “landingbg”, your background file will replace the default template background file. Remember, you must name your background image file to exactly “landingbg” for this to work correctly.
If you have upload the background file and it does not appear on your website, check if the size, format and name of the background image file is correct.
Step4: Preview and Save
Preview your new background and you are ready to Publish your new website layout!


