How to Use Carousel Widget
Customization Tutorials
Once you finish the video tutorial (to the left), you can move on to the customization tutorials (below). You will learn how to edit the following:
You will find the links to the customization tutorials by clicking on the buttons above OR in the “Read Me” PDF guide in the download package.
How to Use Carousel Widget also comes in step-by-step written guide
View Written Version of How to Use Carousel Widget
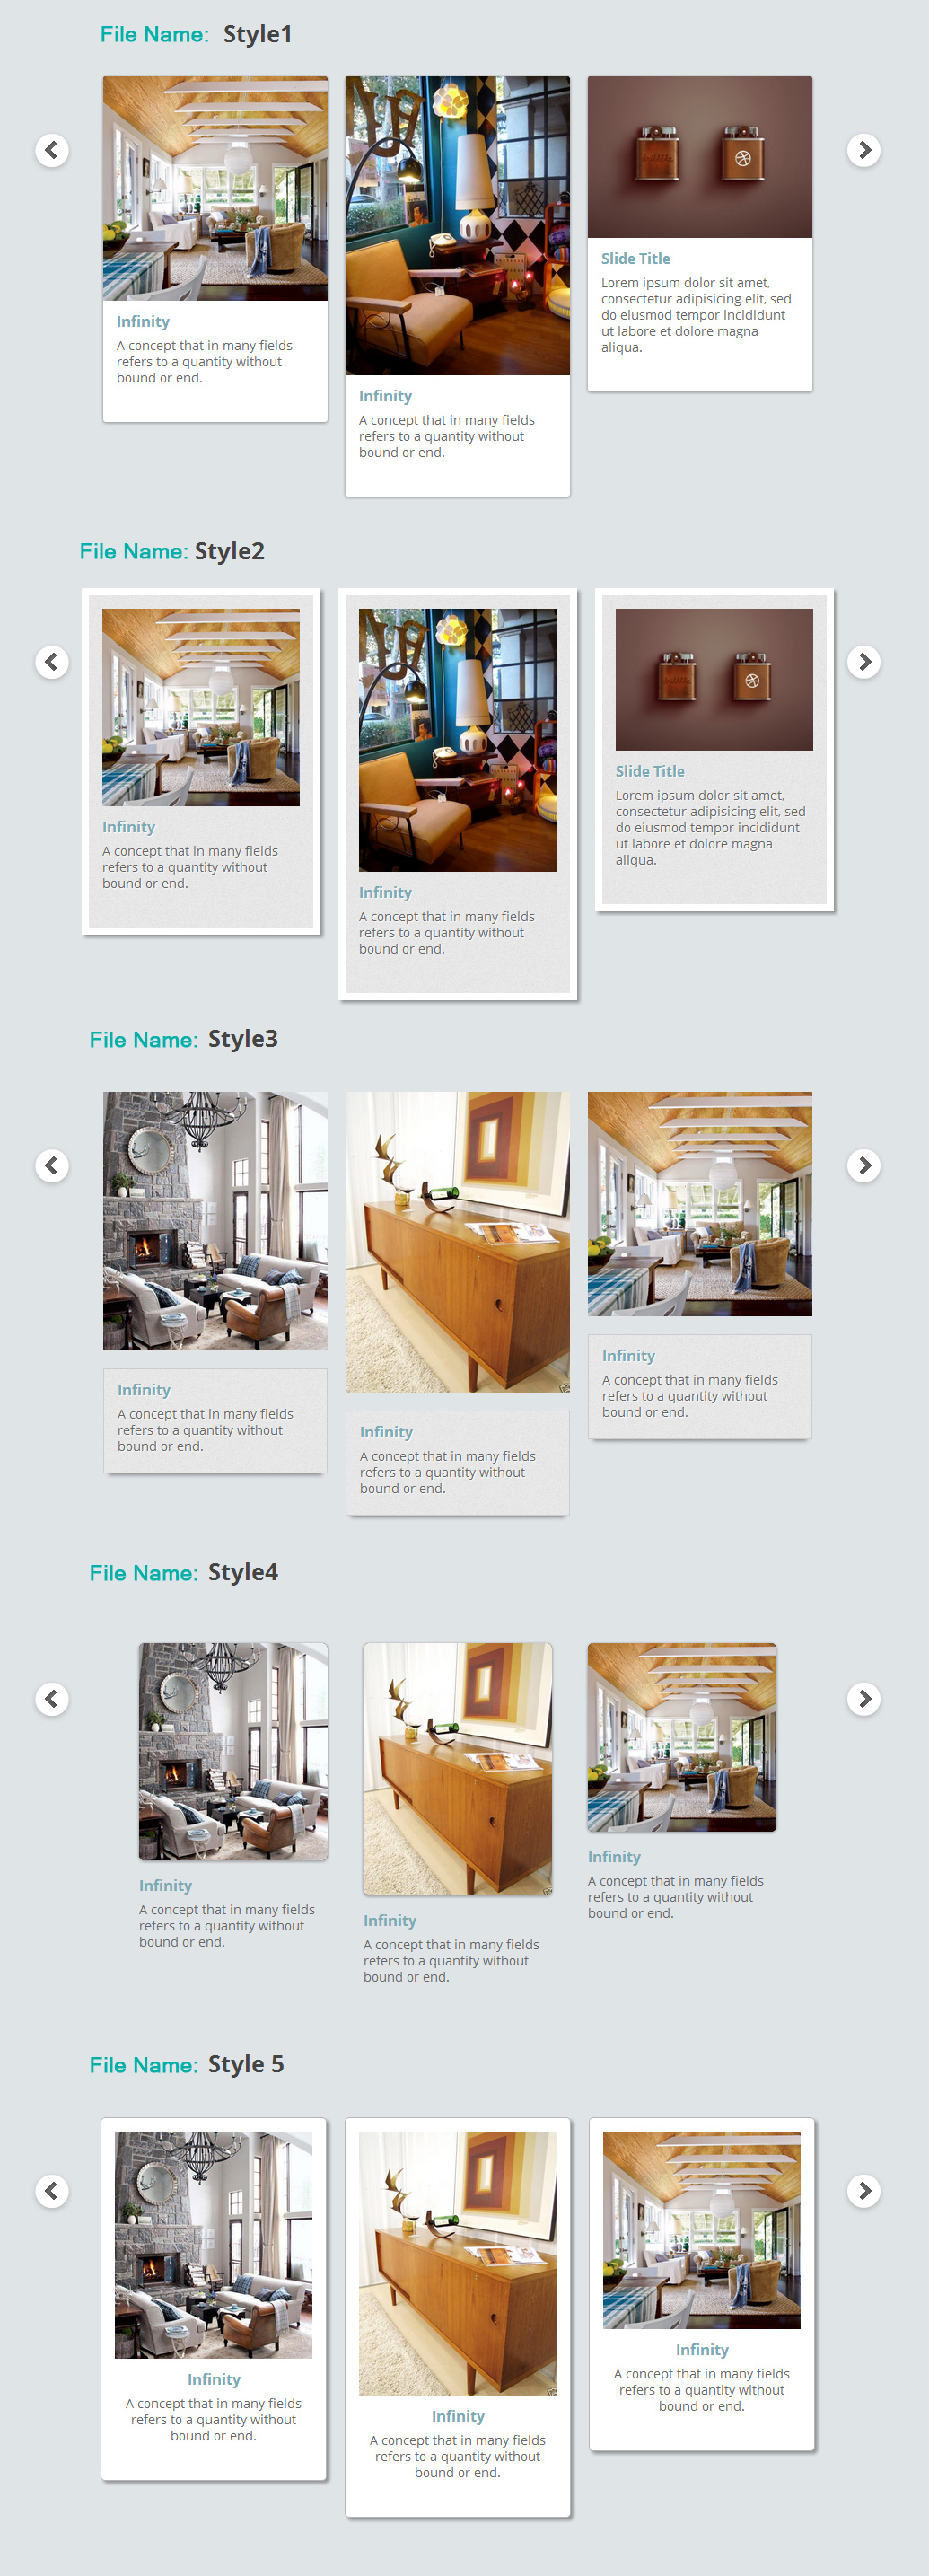
Carousel Widget Style/HTML Code Reference Guide
Use the Carousel Widget HTML Code Reference Guide below to find the correct code package to insert into your website. You will also find this same guide in the “Read Me” PDF Guide located in the download package.

How to Use Carousel Widget – Written Instructions
Step 1: Get Familiar with the Download Package
In the download package, you will find the following file and folders:
- Carousel 1 Folder
- Carousel 2 Folder
- Carousel 3 Folder
- Carousel 4 Folder
- Carousel 5 Folder
- “individual column html” file
We will be working with these files and folders in the “How to Use Carousel Widget” tutorial.
Step 2: Picking a Carousel
The Carousel Widget allow you to insert up to 5 Carousel per page. We will first determine number of carousel widget you will be inserting. For example, if this is your 3rd carousel widget you are inserting into your Home Page, open the Carousel 3 folder.
When you click open the folder, you will find 5 documents. Each document holds the html codes for the one of five style available to you.
- Style 1
- Style 2
- Style 3
- Style 4
- Style 5
Step 3: Picking a Style
The Carousel Widget comes in 5 styles. Select the style you want and open corresponding document with Notepade or Wordpad. If you are a mac user, open the document with Text Edit.
a) Select all the codes in the document by clicking Ctrl+A or right click and “select all”. Copy the selected codes by clicking Ctrl+C or right click and “copy”.
Step 4: Insert Carousel Widget
If you haven’t have your Weebly open, click here to access your Weebly account.
We will add the Carousel Widet using the Custom HTML tool in Weebly. Drag & Drop the Custom HTML icon to any where you want the Carousel Widget to appear in.
Click into the Custom HTML area and paste the copied Carousel Widget Codes.
Once the codes are paste you will see 4 column with dummy text (you can add / subtract more columns in Step 5 below). There are currently no images in the carousel column. We will get to adding text, links, and images in the next customization tutorial.
Step 5: Adding and Deleting Carousel Columns
You can add or subtract the number of columns displayed in your Carousel. There are no limit to the minimum or maximum number of columns (as long as your website content width allows more columns, and also your design of course).
Each column has 2 comment in the HTML codes that define the beginning and end of each column as shown in the image to the right.
The first pink highlighted code, “<!– Column Begin –>” marks the beginning of the column
The second pink highlighted code, “<!– End of Column –>” marks the end of the column
Deleting Carousel Columns
To delete a Widget column that you don’t need. Simply highlight and delete the codes between <!– Column Begin –> and <!– End of Column –>.
Adding Carousel Columns
Now that we know how and where to find where each column code ends, we can add new columns by locating the last <!– End of Column –>.
In the download package, open the “individual column html” file with Notepad or Wordpad. For mac users, open the document using Text Edit.
This document contains the code for a single column. So if you want to add another column in the Widget, just copy all the codes in the file, and paste it directly below the last <!– End of Column –>
Step 6: Adjusting Your Widget
The widget carousel is created to automatically span the width of the website. You can alter the width of the carousel by placing it in a Weebly column tool. Depending on the width of the Weebly column tool, the carousel will automatically adjust the number of carousel column to display.
The instructional video show you in better detail how to us the Weebly column tool to adjust the carousel width.


