


Installation Guide – Install Image Widget Package
Welcome to DivTag Image Widget installation guide. Here we will go through step by step how to setup the widgets in your Weebly website.
Step 1: Insert CSS Codes
a) Open W Theme Editor
Click here to log into your Weebly account and to open up the W Theme Editor.
NEW EDITOR

OLD EDITOR

Click to enlarge image for more detail
b) Copy CSS Codes
In your download package, open the divtaggallery-CSS using Notepad OR Wordpad. If you are a Mac user, you can use TextEdit to open the divtaggallery-CSS file.
Select and copy all the codes in the file. You can use Ctrl+A and Ctrl+C to select and copy all codes; or you can right click to “Select All” and “Copy”.

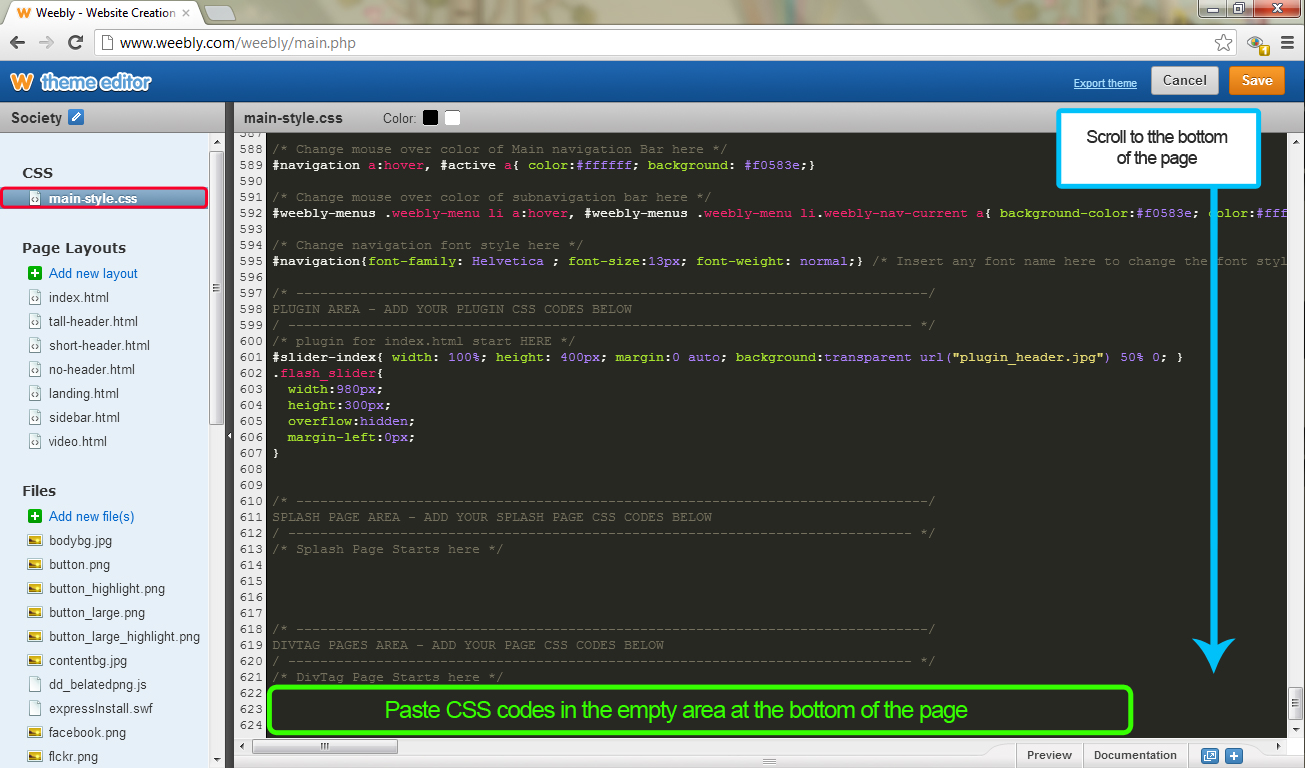
c) Paste CSS Codes in main_style.css
In the W Theme Editor click on main_style.css to open up the css page. Scroll down to the very bottom where you see blank space. In the blank space at the very bottom, paste the CSS codes you just copied.
Step 2: Upload Widget Icons
On the left hand side column, find “Add new file(s)” and click it to open the upload window. Upload all the image files in the icon folder (you can locate this folder in the download package)
Click on the image to the right to enlarge the image.
![]()
Step 3: Save & Exit
Congratulations – you have just successfully installed DivTag Image Widget. Please Save and exit W Theme Editor.
Next Step: Click the button below to watch the next tutorial video to learn how to use / configure DivTag Image Widgets